Pages

Saturday, November 28, 2009

Bicycle Project 2, day 10

Final day of the frame building course.


Alignment of the rear triangle checked with a wheel in place.


Seat stays measured.


Seat stays slotted for the rear dropouts then mitered with mechanical precision.


If it’s not already obvious, this is not the standard frame-building course. I cannot replicate this frame (well, maybe after 15 years experience...) and David made it clear that he would have to play a significant role in the build. And that the frame would not be complete within the 2 week allotted period...


Nonetheless I was able to understand the process of building a frame and thereby deepen my appreciation of the craft. To (ultimately) end up with a custom bicycle frame, built to a superb level of finish, and to say that I had some role in its development, then all the more sweet.


Seat stays in position (well we nearly got there...)


Approximately 250 people attend bicycle frame-building courses in the US every year and the vast majority never plan to build a bike again. I’m no different from the majority except that I wanted a certain frame that I could not build on my own and few people in the world could teach me this.


In the process I have had a great time, tempered my bicycle cravings and gained a whole new perspective of the industry from the engaging & enlightening rants of a master frame builder.


Cycling jewelry in an S&S coupler. Nice to see such craftmanship still being practiced in our increasingly impatient and indifferent world.

www.bohemianbicycles.com


I will post pictures of the completed bicycle when I receive it in February 2010.

Friday, November 27, 2009

Bicycle Project 2, day 9

Tucson on the morning of Thanksgiving Day (hey, no cars...)

America the bountiful. Today is the fourth Thursday in November which makes it Thanksgiving Day in the United States. A true harvest festival with a glorious celebration of food and companionship at the dinner table. Dave was kind enough to invite me to a Thanksgiving dinner and my first taste of American-Jewish hospitality. Wonderful. What more does one need?

Well, may be a nice bike would further nourish the soul.

So on to today's endeavours. We started up with paint selection and hand-mixing the various components (dyes mixed into a clear base). I've decided on a traditional scheme with an ivory base colour and a blue HT and DT panel. Yellow pinstripes strategically placed complete the look.

Baby blue bottled (in the background)

In the meantime Dave sets up the frame jig and then tacks the frame before checking alignment.

All done in frame setting jig.

Final check in frame alignment jig.

Dave brazes the fancy stainless lugs.

The Stig steps in to braze the bottom bracket.

Um Dave I think we forgot something...

Lugs are refined - clean up the shore lines and thin out the lugs to be ready for polishing tomorrow.

Note that the lugs are refined and polished with the seat stays not yet attached. It is just one way of building a frame but allows access for meticulous lug refinement.

Thursday, November 26, 2009

Bicycle Project 2, day 8

Another day passes and I'm starting to wonder whether I should recalibrate the statement " I built this bicycle with some help from David Bohm" and admit that "David Bohm built this bike with some interference from me".

Nah.

Today was all about frame alignment and lug preparation for the final build. Cleaning the lugs down to 150 grit then setting the frame takes plenty of time. And there's simply no sex-appeal to this job. Although Chelsea (Dave's very friendly and docile dog) did rub up and down my leg a bit.

Top head tube lug ready for painting. Remainder of the frame is not quite as finished...

Tomorrow we select the colours for painting and connect the frame elements. We should have the frame brazed together before I leave on Friday.

Wednesday, November 25, 2009

Bicycle Project 2, day 7

9PM, 23 Nov 2009

1AM, 24 Nov 2009

"Yeah you get it"

For David Bohm there are those that "get it" and those that "don't get it". In our predominantly cyclocentric conversations, those that "get it" are those that know that bike fit is more important than the weight of the bike. That the quality of a ball bearing (based on roundness, surface smoothness, strength etc) is more important than whether it is made of steel or ceramic. That the stiffest frame does not make it the best handling frame for all situations.

We wonder why so many people suck up market propaganda without hesitating to think about what they are being sold. Clearly it happens in all areas of life and not just the bicycle world. And most of us are guilty of it to some degree.

Then again there are those that don't appreciate art or, on a more earthly level, fine craftsmanship. What is beautiful to my eye may not warrant a glance from the majority. And in this sense art is hard to define. But craftsmanship differs in that it is no more than a sum of its parts and appreciation of this is a measure of one's understanding of the subject. (As opposed to art, which for me at least, deceives the spectatator into believing/ feeling that it is more than the sum of its parts).

Buffing wheel and cutting compound.

Oh my! is that new polishing compound?

Buffing wheel and polishing compound.

So broight mah eyhes hurt...

Back to earth. Take the stainless steel fork crown in this bicycle project. It's a Pacenti twin-plate fork crown that costs $35 USD. That's the same price as the regular (non-stainless) crown. The fork steerer and legs are standard non-stainless tubes. So how does the cost of a stainless build ramp up?

First up it requires silver brazing as opposed to bronze brazing which is a much more expensive brazing material (by weight). Ok the overall outlay still isn't much greater but stainless lugs are also technically harder to silver-braze than their regular brethren. It takes greater skill to do a clean job but not necessarily a huge additional time expenditure. A builder with proficiency in building stainless lugged frames comes with some experience and that does add to the cost (as it does in any other industry).

Take the stainless steel fork crown one step further. Modern investment-cast lugs, this included, come relatively clean but the lines are not necessarily appealing. Custom cutting the lug requires a steady hand, a good eye, plenty of time and appropriate equipment. Equipment that cuts down on time whilst maintaining quality in the build is often expensive and specialized. I'll give David Bohm a plug here as he is exceptionally good in all these areas.

Once the brazing is done the lug edges need refinement to make sure the shore line remains crisp. Assuming that the basics are taken care of (no underfill, no overheating, good penetration etc) this non-essential part again adds time to the build. In the real world time and experience cost money.

Then there's the polishing. I spent 4 hours last night hand-polishing the fork crown. My fingers were numb, my clothes black (not to mention the hotel carpet...), and my mind full of late night cable TV nonsense. But the lug edges remained crisp and the surface imperfections close to the point that machine-polishing could then take over. I'm somewhat proud of that but even happier that I'm not the one having to mask off and finish the lugs after painting (yeah there's that to think about as well)...

The upshot of all this is: if you plan to take this frame-building course and want to make a bicycle with stainless, polished lugs then think again. You enter this endeavor because A. you have plenty of experience and want to refine your abilities, B. you expect David Bohm to play a large role in the build or, C. you just DON'T GET IT!

Of course the other option is to get the frame built for you. However, don't be too surprised to find that there are not many people able to make a custom stainless-lugged bicycle frame. And when you do find one, try not to swallow your tongue when you hear how much it will cost.

Enough rambling and back to today...

Rear dropouts brazed into place.

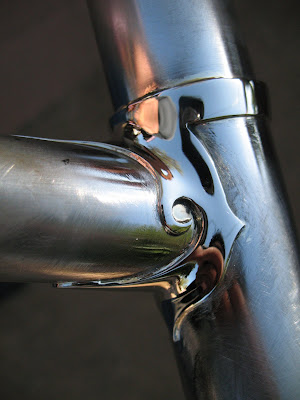
Head tube - top tube junction with hand cut stainless steel lug (lug yet to have final adjustments).

Frame-setting jig.

Tacking the junction to maintain alignment.

Brazing the join (little room for error in a bikini lug so I'm only allowed to watch).

Beautiful clean brazing.

Yeah she's clean (the fine grey line at the edge of the lug is the silver filler).

Tuesday, November 24, 2009

Bicycle Project 2, day 6

Another full day on the job. The frame is to be built in segments to allow easier handling of the individual components. So a plan of attack is drawn up and away we go.

Jobs to complete today are: slotting the seat stays to fit the dropouts in preparation for brazing, cut and miter the main tubes and braze the bottom bracket & seat tube, and finishing the details on the fork crown.

Seat stays cut and filed.

Clean slots if I say so myself.


Dave adds his trademark curved end to the stay.


Dropouts slot into place and alignment checked.


Nice bend to the dropouts as they meet the stays.


I said it before and it's worth saying again, but stainless steel slotted dropouts are a lot of hard work. The slots are measured, cut and finished by hand. Then there's the alignment to be set and the dropouts to be adjusted (and these dropouts take some convincing to make them bend). Then there's still the final alignment and the brazing to do... but we'll tackle that tomorrow ;-)

Dave then shows how mitering can be done quickly and with mechanical precision. Got to make up time somewhere...

Set the angles on this big machine.


Whhhrrrrrr...


Bottom bracket with the mitered seat tube is then set-up in the frame setting jig (after the BB has been faced to sit flat against the jig) then the construct is tacked into place with silver.


Frame setting jig prior to brazing.


The alignment is then usually checked using blocks and a surface plate (a machined flat surface). But Dave likes to mess around with a frame alignment jig as it has more knobby bits to play with...

The alignment jig has to be calibrated...


...which can take some time...


...perfect.

Turn that black handle and you can tune that construct into perfect alignment.


Then the brazing is done. And yep, brazing a non-stainless lug is much easier (the BB lug is not stainless in this case - I had to be able to braze something without David Bohm cleaning up after me). The silver flows effortlessly across the join.

Into the workshop and it's back to the stainless steel fork crown. Cleaning up the edges of the lug to get that sharp, clean shoreline requires special tools and a bit of plain ol' grit and determination. The lugs are then gently filed and feathered to give them a nice shape but great care is taken not to lose the sharp edge (a mark of a meticulous craftsman).

And then there's the polishing.


Once you complete the framebuilding course you get to take home one of these cool (I'm not a politically-correct metrosexual, I'm a framebuilder...) T shirts.


It's getting dark so off I go with 20 sheets of fancy abrasive paper to do a bit of homework. Each sheet has a diminishing grit with the finest as smooth as velvet.

Excuse me as I have some work to do...

Sunday, November 22, 2009

Bicycle Project 2, day 5 1/2

Physical beauty. No matter how we like to think otherwise it is often the eye that leads the heart and mind. As the bicycle starts taking shape the emotion deepens and the accomplishment of each step gains its full appreciation. This morning the fork crown lug edges were tidied up, the blades cut to length, the alignment checked on the jig and rechecked on a wheel, then all welding areas prepared and then finally it's all brazed into place.


Nice set of legs there (even without cleaning off the flux).

Nice even brazing with no overheating, underfill or overfill here...


Pretty clean from this angle as well.


With the forks done we head off to the Bisbee Bicycle Brothel. On the way there's time for a stop at Tombstone for man-food to feed the men who have forged metal with fire - ie burger and chips (with Pecan ice cream on a waffle cone to go please).

Nice stretch of the American Wild West in Tombstone (between the Lincoln and Chevy truck parked at either end of the block).


The OK Corral and the Birdcage Theatre on the same stretch of road. This is the place of gunslingers, gold, sunshine, and pretty ladies...


Bisbee is a very pretty little town set up into the mountains with narrow winding streets that seem to connect people. So different from the wide open roads that serve to connect places. Could easily spend a lot more time here.

However we are here to visit the Bisbee Bicycle Brothel which is basically where its proprietor, Ken Wallace, stashes his awesome bicycle collection. Ken is a real vintage enthusiast and hardly anything is for sale. So take a look around but don't expect to take her home with you (psst Ken in that sense it's a strip tease and not a brothel). I took a look around while Ken and Dave talked shop.


I'm excited...


Now this is what I call a collection. When you walk though the front door there are Alex Singer and Waterford touring bikes directly in front of you and a Pegoretti, Alex Moulton, and Cinelli Mod B (in original condition with full Altenberger group including brakeset!) directly to your right.
That just covers first five bikes...


So much history here...
Check out the cool bike with the basket and parallelogram suspension fork.
Anti-dive suspension forks have clearly been around for a long time...


1950's Cinelli Mod B in original condition.


Who's that overweight, cigarette-smoking dude that needs to lay off the weed?

Dario Pegoretti.

Saturday, November 21, 2009

Bicycle Project 2, day 5

Fork building. This takes serious effort and time. On top of that the sun set a little early today so there's going to be more work to do tomorrow. And may be we shot the breeze a little more on all sorts of interesting tangents.

The first thing is to set the fork rake (43mm with a 73 degree head angle for those that are interested). The measurements are quite precise then we use a big mandrel, add some weight at the end of the lever, and the fork tangs bend into shape. Just how much weight to lean into the lever takes a special art (made even more mystical given that there is some over-bending required to set the curve).


Measure the rake to the millimeter then use this big (uncalibrated as different fork tangs have different plasticity) to set the curve...


Yeah ok, she looks pretty well matched (note fork ends not yet removed).


Next step is to prepare the tangs to accept the dropouts. And henceforth I enter the world of the slotted dropout. These little buggers are slotted into the tube ends. Yeah? So cut a slot into the tube end, then prepare the tube end and the dropout to fit, then braze and fill, then finish by refining the join.

A word of advice: if you are going to build a bike go for the "shot-in" or "plug-in" dropouts. Sure they're not as customizable but you just braze the lil' suckers on (even I could do it). If you want real pain then go for the slotted dropouts in stainless steel. You have to braze in silver and that stuff goes from a solid wire in your hand to molten slag burning a hole in your shoe in seconds.


Slotting the fork tang.

Machining the steerer tube to fit the fork crown.

Fork is then built up and set in alignment jig.

Slotted dropouts in place.


She's so pretty and she ain't even brazed yet.


David Bohm brazes the right fork leg.


Dave cleans up after letting me braze the left fork leg (not quite sure how the silver got all the way down there gov'ner...)


Noice!


The fork crown also needs some refinement. Not happy with the curves we decide to refine them just that extra bit more. Again I have to supervise Dave...

Bit more to the left there Dave.


Lovely curve back there.


Refinement still needed on this front curl.

At the end of the day we still have to finish the crown, cut the fork legs to length and braze the whole thing together. I guess it beats going to the LBS and buying a carbon fork. Or does it? More tomorrow.